The most common reason dust keeps blowing out of your vents is a dirty, overdue, or poorly seated furnace filter that’s letting particles bypass it entirely. Turn off the HVAC system, pull the filter, and check it against the light. If it’s grey, sagging, or hasn’t been swapped in three months, replace it, then vacuum the register covers before you turn the system back on.
TL;DR:
- A poorly seated or overdue filter allows dust particles to bypass filtration, especially if the filter is sagging, grey, or not replaced in three months.
- Leaky duct joints and outdoor debris infiltration significantly contribute to dust buildup, with indoor sources like pets, candles, and renovation dust also playing a role.
- High-efficiency MERV 13 filters capture about 85% of particles in the 1 to 3 micron range but may not be suitable for older systems, where standalone HEPA units are a better option.
- Regular maintenance of HRV/ERV systems and dryer vents, including twice-yearly cleaning and routine filter replacement, minimizes dust emission from these separate systems.
- Professional inspection and cleaning are recommended for persistent dust, mould, pests, or damaged ducts, with costs typically ranging from $400 to $800 for full duct cleanings.
Table of Contents
- Common causes of dust from vents
- How to remove dust from registers and vents
- Preventive maintenance that actually cuts vent dust
- HRV/ERV and dryer vents: separate systems to check
- When to consider professional duct cleaning or inspection
- What technicians commonly find and recommend
- Balancing DIY fixes with professional help
- Getting professional help when DIY isn’t enough
- Sources
- FAQ
Common causes of dust from vents
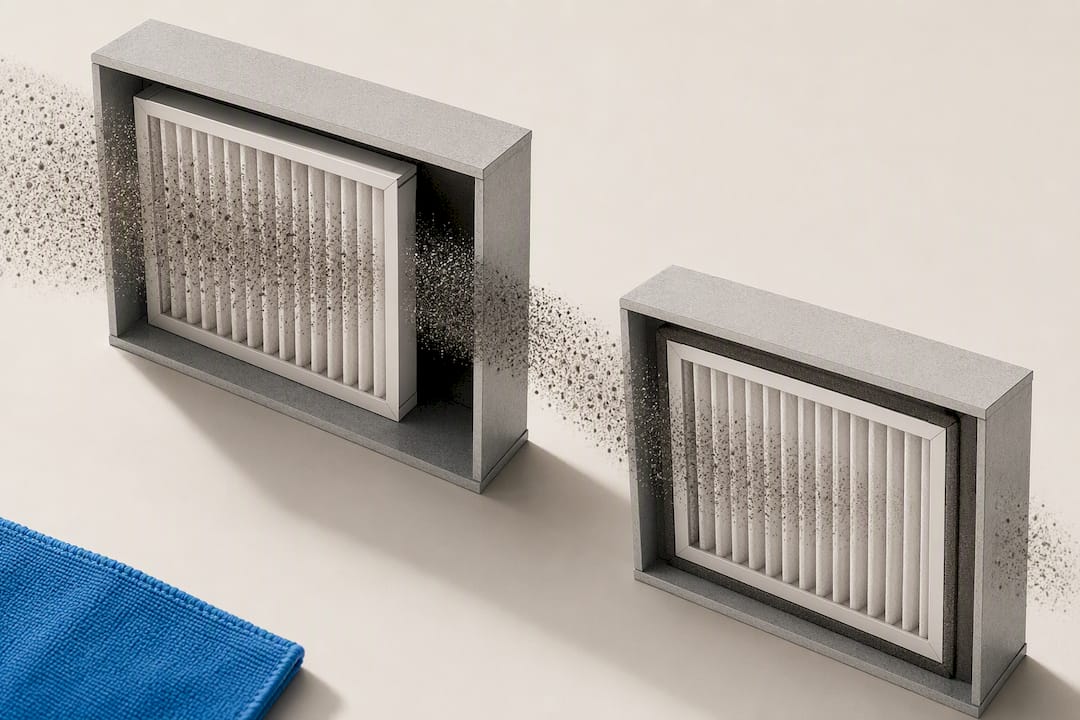
A dirty filter doesn’t just stop working when it clogs. Once airflow resistance builds up, air finds the path of least resistance around the filter’s edges instead of through it, a problem called filter bypass. Even a fresh filter installed slightly loose in its slot lets dust-laden air skip the filtration step completely, which is why a filter rated at a typical efficiency level can still fail to keep vents clean if it isn’t seated properly.
Leaky or unsealed ductwork is the second big culprit. Ducts running through an attic, crawlspace, or unfinished basement often have gaps at the joints. Those gaps pull in insulation fibres, attic grit, and outdoor grime every time the blower runs, then distribute it straight to your registers.
Indoor sources matter too, and homeowners tend to underestimate how much they contribute:
- Candles and cooking smoke release fine soot particles that circulate through return air.
- Shedding pets, fabric fibres, and skin cells (household dust is largely made of this) settle in ducts and get resuspended.
- Renovation work, even a single drywall patch, can send fine dust throughout an entire duct system.
- Smoking indoors leaves a sticky residue that traps dust and darkens vent covers.
Black or dark particles usually signal something more specific than “dust.” They can be soot from candles or a poorly tuned furnace, rust flaking from an aging duct, degraded insulation fragments, or, less often, mould spores. Black particles in vents sometimes get blamed on the ducts when the real source is elsewhere in the system, which is why colour alone isn’t a reliable diagnosis.
Finally, don’t assume all dust comes from the main HVAC trunk. Heat recovery ventilators, energy recovery ventilators, and dryer vents are separate systems with their own filters and airflow paths, and each one can dump dust into your living space independently of your furnace.
How to remove dust from registers and vents
You can clear out visible dust from vents in about half an hour without any special equipment. Work through these steps in order:
- Shut off the HVAC system at the thermostat or breaker before touching anything.
- Unscrew and remove each register or grille, then vacuum both sides using a brush attachment.
- Wash metal or plastic grilles in warm soapy water and let them dry fully before reinstalling.
- Vacuum just inside the duct opening on a low-suction setting with a soft-bristled brush attachment, working gently so you don’t push debris deeper into the trunk line.
- Wipe the register frame and surrounding wall or ceiling with a damp microfibre cloth to catch settled film.
- Reinstall the grille once everything is dry, then restore power and run the system for a few minutes to confirm normal airflow.
Skip any spray treatments, biocides, or duct sealants during a DIY clean. Those products are only appropriate when a qualified inspector has confirmed mould or microbial growth, and using them without that confirmation can mask a problem instead of fixing it.
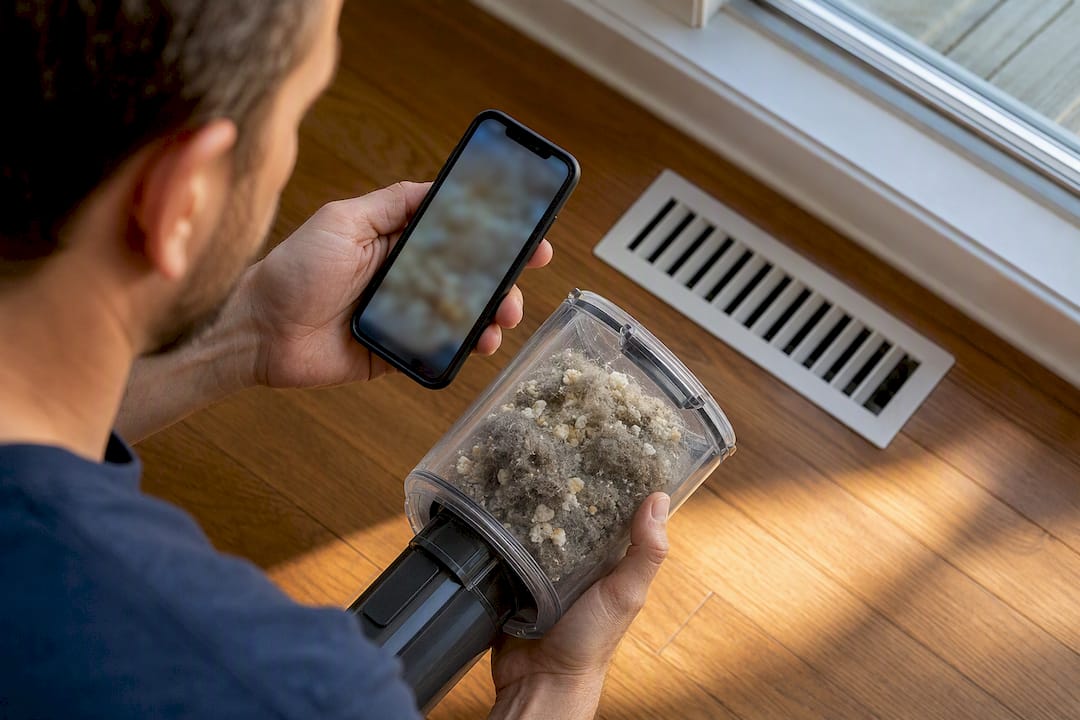
Pro Tip: Take a photo of what you vacuum out before you dump it. If you see continuous heavy dust, insulation fragments, or anything that looks like mould after two or three cleanings, that photo becomes useful evidence when you call in a professional.
Preventive maintenance that actually cuts vent dust
Filter choice matters more than most homeowners realize. MERV ratings run from 1 to 16 for residential systems, and higher-efficiency filters rated MERV 13 capture a much larger share of fine particles than a standard MERV 8. Check your furnace manual before upgrading, though. Some older blowers can’t handle the added resistance of a dense MERV 13 filter without losing airflow or straining the motor. If your system can’t take a high MERV filter, a standalone HEPA unit for specific rooms is a reasonable substitute.
By the numbers: MERV 13 filters capture roughly 85% of particles in the 1 to 3 micron range, according to Health Canada’s ventilation guidance, the size range that includes most fine household dust and smoke.
Replacement frequency depends on your household, not a fixed calendar date:
- Homes with pets, kids, or frequent renovation dust: check monthly, replace when visibly grey.
- Typical homes without heavy dust sources: every three months is usually enough.
- Always confirm the filter sits flush in its housing with no visible gap around the edges.
Running your blower fan continuously, or at least for extended stretches rather than only during heating and cooling cycles, increases air exchanges and helps the filter do its job instead of letting particles settle and get kicked back up later. Sealing accessible duct joints with mastic or metal tape, keeping outdoor intake vents clear of leaves and debris, and doing a visual duct inspection once a season round out a solid prevention routine.
HRV/ERV and dryer vents: separate systems to check
Your heat recovery ventilator or energy recovery ventilator runs on its own schedule, and skipping its maintenance is one of the most common reasons homeowners blame their ducts for dust that’s actually coming from elsewhere. NRCan recommends inspecting and cleaning the core and filters twice a year, and running the unit continuously for the best ventilation performance. A neglected core reduces airflow and lets dust accumulate inside the unit itself.
- Check the exterior intake and exhaust hoods each season for leaves, snow, or nesting debris blocking airflow.
- Clean or replace HRV/ERV filters on the same twice-yearly schedule as the core.
- Inspect your dryer vent for lint buildup every few months; it’s a major dust source and a documented fire hazard when neglected.
- Have the dryer vent professionally cleared if you notice longer dry times or a burning smell.
When to consider professional duct cleaning or inspection
Call in a professional when you see clear warning signs rather than routine dust: visible mould growth inside ducts or on registers, evidence of rodents or insects, heavy dust from recent construction that a vacuum can’t handle, or damaged insulation flaking into the airflow.
- Confirm mould or contamination with a visual inspection before agreeing to any treatment.
- Ask whether the technician uses trap media testing to identify where particles originate.
- Be wary of any provider pushing biocide fogging or sealant coatings as a default step.
Professional cleaning removes deposited dust effectively, but it won’t lower your home’s overall particle count unless the underlying source, whether that’s a leaky duct or an unaddressed HRV gets fixed too.
What technicians commonly find and recommend
Field visits turn up the same handful of issues again and again: overdue filters, dryer vents packed with lint, duct joints that have come apart behind a wall, and HRV cores nobody has touched in years. After that work gets corrected, homeowners typically notice less surface dust on furniture, steadier airflow from room to room, and a furnace that runs quieter and more efficiently.
Balancing DIY fixes with professional help
Start with the filter and a visible-dust cleaning; document anything unusual with photos before you decide what’s next. Reserve professional callouts for mould, pests, or dust that keeps returning within weeks. If you do book a technician, pair duct work with your seasonal furnace cleaning so you’re not paying for two separate visits.
— Jayce
Getting professional help when DIY isn’t enough
A professional duct cleaning company can provide certified technicians who inspect your actual duct system, filters, and HRV core instead of selling a one-size-fits-all treatment, with clear pricing and no hidden fees before work starts.

If your vents keep producing dust after a filter change and a thorough cleaning, the next reasonable step is a proper inspection rather than another round of guessing. Before booking, jot down your filter size, when it was last changed, and how long the dust problem has been happening; a quick photo of what’s collecting on your registers helps too. A typical visit starts with a walk-through of your system, checks for leaky joints or contamination, and only recommends treatment where it’s actually warranted.
Bluebrothers handles air duct cleaning for $400 to $800, dryer vent cleaning for $99 to $225, and HRV cleaning for $100 to $400, all one-off service fees with round-the-clock support for anything urgent. Request a quote and get a technician looking at the actual source of your dust problem instead of another filter you’ll swap out in three months anyway.
Sources
The guidance in this article draws on public agencies with direct oversight of indoor air quality and ventilation standards. Health Canada’s ventilation and filtration guidance covers filter selection, Natural Resources Canada’s HRV maintenance guide covers heat-recovery systems, the EPA’s duct-cleaning guidance sets expectations for professional service, and UL’s investigation on black particles explains dark-dust identification.
- Should you have the air ducts in your home cleaned? | US EPA
- Home ventilation: heat recovery ventilators (HRVs) | Natural Resources Canada
- Canada
- Black particles and HVAC system | UL Solutions
FAQ
Why is so much dust coming out of my vents?
The usual cause is a dirty or improperly seated furnace filter that lets particles bypass filtration entirely. Leaky ductwork drawing in attic or crawlspace debris, and indoor sources like pet hair, candles, and renovation dust, are the next most common culprits.
How do I remove dust from my vents?
Turn off your HVAC system, remove the register covers, and vacuum them with a brush attachment before washing and drying them. Vacuum just inside the duct opening on low suction with a soft brush, then wipe surfaces with a damp cloth, saving any spray treatments for cases a qualified inspector has actually confirmed need them.
What can I put in my vents to prevent dust?
The most effective step isn’t something you put in the vent itself. It’s upgrading to the highest MERV-rated filter your system supports, typically MERV 13 where the manufacturer allows it, and replacing it on a monthly or three-month schedule depending on your household.
What are the signs that my air ducts are dirty?
Visible dust blowing from registers shortly after a filter change, dark streaking around vent covers, or a musty smell when the system runs are the main signs. Visible mould, pest debris, or damaged insulation inside the ducts are signs you need professional cleaning rather than a DIY fix, since those situations go beyond what a household vacuum can safely handle.
Recommended
- New Year 2026, Cleaner Air: Why January Is the Best Time for Duct Cleaning
- Cold Outside, Clean Inside: How Duct Cleaning Keeps Your Home Comfortable All Winter
- Stop Wasting Heat: How Clean Air Ducts Improve Furnace Efficiency in Winter
- Stay Safe This Winter: Prevent Fire Hazards with a Clean HVAC System