Do this first: remove debris, ventilate the space, HEPA-vacuum every surface, wet-wipe with detergent, then address HVAC components and filters before a final floor pass and inspection. Wear at minimum a fit-tested N95 respirator while dust is airborne. A single room might take a few hours, while a professional whole-home clean averages around $475 in Canada.
TL;DR:
- HEPA vacuuming and wet-wiping are essential to remove over 95% of dust, but they must be performed in the correct sequence to be effective.
- Bathrooms, kitchens, and soft goods require specific cleaning approaches, such as scrubbing grout, degreasing surfaces, and laundering textiles, to ensure thorough dust removal.
- HVAC systems need special attention with filter upgrades, duct vacuuming, and possibly professional cleaning to prevent recirculation of fine dust particles.
- Homes built before the 1970s may contain asbestos or lead, requiring immediate stop-work, containment, and professional abatement if disturbed.
- Budget around $475 for professional cleaning, with complete remediation often taking multiple days if multiple rooms or HVAC contamination are involved.
Table of Contents
- Your printable phased cleaning checklist
- Room-by-room checklist for every space in your home
- How to vacuum, wipe, and repeat without spreading dust further
- Getting HVAC, vents, and filters clean again
- Red flags for asbestos, lead, and other hazards
- Equipment and supplies to gather before you start
- How long it takes and what it typically costs
- Why we built this checklist around air systems first
- Where DIY ends and a professional call begins
- Let us handle the air side of your renovation cleanup
- FAQ
- Sources
Your printable phased cleaning checklist
Work through these phases in order rather than jumping straight to vacuuming, since skipping steps just moves dust around instead of removing it.
- Clear debris: haul out scrap material, packaging and leftover supplies before any cleaning starts.
- Ventilate and contain: open windows where possible, seal off finished areas with plastic sheeting, and let airborne dust settle for a few hours.
- HEPA vacuum everything: ceilings, walls, floors, vents and every horizontal surface.
- Wet-wipe with detergent: a damp microfiber cloth lifts what the vacuum leaves behind.
- Repeat the vacuum pass: this second pass catches dust resettled during wiping.
- Address HVAC and filters: clean registers, swap filters, and check ducts for visible buildup.
- Final floors and inspection: mop or steam-clean, then walk the space to check for missed residue.
Skip dry sweeping and compressed air entirely, since both scatter fine particles rather than capturing them. A minimum of a fit-tested N95 respirator protects you through the dustiest phases, and this sequence protects both your lungs and your new finishes.
Room-by-room checklist for every space in your home
Each room collects renovation dust differently, so a generic wipe-down misses the spots that matter most.
- Kitchen: clear debris first, then degrease cabinet exteriors and interiors, wipe down appliances, and remove and wash exhaust hood filters separately in hot soapy water.
- Bathrooms: scrub grout lines where dust settles deepest, disinfect fixtures and hardware, wipe mirrors with a lint-free cloth, and clean bathroom exhaust vents.
- Living areas and bedrooms: work top to bottom, starting with ceilings and light fixtures, then blinds, baseboards, floor registers, and finally closet shelving and rods.
- Windows and glass: remove paint overspray with a plastic scraper rather than a metal one on tempered glass, then clean tracks and sills where grit collects; a professional window cleaning pass handles stubborn overspray safely when scraping risks scratching the glass.
- Soft goods: launder curtains and linens on a normal cycle, and remove upholstery covers for washing separately rather than vacuuming them in place.
Cabinets and countertops installed during the renovation often carry a fine film of construction residue that a quick wipe will not fully lift. Wipe them with a mild detergent solution, then rinse with plain water to avoid leaving a cloudy residue on new finishes. For electrical fixtures, switch off power at the panel before wiping switch plates and outlet covers with a barely damp cloth, since moisture and electricity do not mix. Basement renovations tend to generate the heaviest dust load of any room type, so give finished basements extra passes with both the vacuum and the wipe-down before calling the space done.
How to vacuum, wipe, and repeat without spreading dust further
A clinical trial comparing cleaning approaches found that a three-step method (HEPA vacuum, wet washing with detergent, then a repeat vacuum pass) reduced contaminant loading by more than 95% on heavily soiled surfaces, and the trial found this held true whether households used a specialized TSP/HEPA approach or ordinary household detergent and vacuum, as long as the sequence itself was followed correctly.
For ceilings, trim and other vertical surfaces, an extension pole fitted with a damp microfiber head lifts dust without the streaking a dry cloth leaves behind.
- A standard household vacuum and detergent work fine for light dust after small cosmetic jobs.
- A HEPA-equipped vacuum becomes necessary once drywall sanding, demolition or sawdust is involved.
- Heavy visible dust in ducts or widespread fine particulate usually calls for a professional service with commercial-grade equipment.
Pro tip: Clean from the farthest corner of a room toward the exit, and keep the HVAC system off until the final vacuum pass to avoid pulling loose dust back into circulation.
Getting HVAC, vents, and filters clean again
Renovation dust finds its way into return vents and settles inside ductwork faster than most homeowners expect.
- Swap furnace filters for a MERV 13 rating where your furnace or HRV unit is rated to accept one, since higher-MERV filters trap finer particles.
- Remove register covers and vacuum both the cover and the visible duct opening with a HEPA attachment.
- Run a portable HEPA air cleaner for several hours after the main cleaning pass, and replace its filter once it looks visibly grey.
- Call a duct-cleaning professional once dust is visible more than a few centimetres into the duct opening, since a household vacuum cannot reach that far.
Guidance on dust control after high-particulate events recommends MERV 13 or higher filters alongside HEPA-equipped vacuums or portable air cleaners, a combination that applies just as well after heavy renovation dust as after other high-dust events.
Red flags for asbestos, lead, and other hazards
Homes built before the 1990s carry a real chance of asbestos in old insulation, flooring or textured ceilings, and homes built before the late 1970s may still have lead in old paint layers. If renovation work disturbs either material, treat it as a stop-work signal rather than something to clean around.
- Stop work immediately and isolate the area if you suspect asbestos-containing material has been disturbed.
- Use HEPA vacuuming and damp-wiping only, since dry sweeping or compressed air can send fibres airborne.
- Bag waste in sealed, clearly labelled bags rather than regular household trash.
- Wear at minimum an N95 respirator, and step up to a fit-tested half-face respirator for confirmed contamination.
CCOHS guidance on asbestos control is direct on this point: stop work, isolate the area, and bring in a qualified abatement specialist rather than attempting removal yourself. Lead-specific guidance from CCOHS adds that housekeeping controls such as HEPA vacuuming and damp-wiping, paired with good hygiene practices, keep exposure down during cleanup.
Stop work immediately, isolate the area, and hire a qualified abatement specialist rather than disturbing suspected asbestos-containing material yourself.
CCOHS asbestos control guidance
Equipment and supplies to gather before you start
A short supply run before cleaning day saves multiple trips once you are mid-project.
- A HEPA vacuum or a HEPA filter attachment for an existing vacuum.
- Microfiber cloths, an extension pole, a mop with disposable pads, and a couple of buckets.
- A sturdy ladder for ceiling and high-trim work.
- Disposable coveralls and respirators rated N95 or higher.
- Heavy-duty trash bags, replacement HVAC filters, masking tape and plastic sheeting for containment.
Most hardware stores rent HEPA vacuums by the day, which beats buying one outright for a single renovation cleanup. For a full breakdown of what comes after the messiest trades finish, this drywall finishing checklist walks through the handoff from construction crew to cleanup crew in more detail.
How long it takes and what it typically costs
A single-room touch-up might take two or three hours of focused cleaning, while a whole-home renovation cleanup often stretches across multiple days, especially when several trades worked in the space or HVAC contamination is involved.
| Job size | Typical timeline | Main cost drivers |
|---|---|---|
| Single room | A few hours | Square footage, finish type |
| Multi-room renovation | One to two days | Number of rooms, trade count |
| Whole-home renovation | Multiple days | HVAC contamination, hazardous materials, HEPA equipment needs |
Professional post-renovation cleaning in Canada averages around $475, and that same source notes that contractors typically leave a broom-swept finish by default rather than a deep clean, so budget for a separate cleaning line item. When comparing renovation contractors, ask directly whether cleanup is broom-swept or detailed, and whether HVAC cleaning is included in the quote.
Why we built this checklist around air systems first
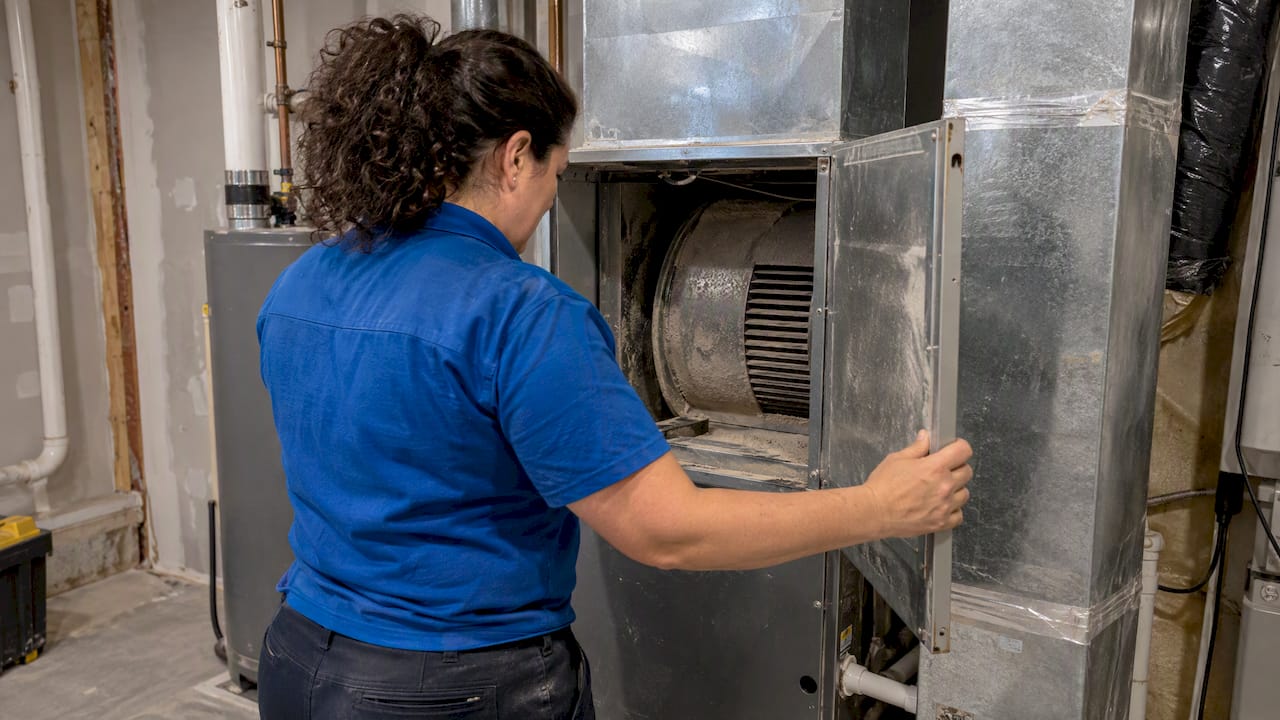
Jayce has spent years watching homeowners focus entirely on visible surfaces while ignoring the duct system quietly recirculating fine dust through every vent. Our team works across duct cleaning, dryer vent cleaning, HRV cleaning and coil cleaning services, and the pattern repeats on nearly every renovation callout: a spotless kitchen countertop sitting above a return vent packed with drywall dust. A quick technician tip we use ourselves is to check the blower compartment, not just the visible register, since that is where heavy debris tends to collect first.
Where DIY ends and a professional call begins
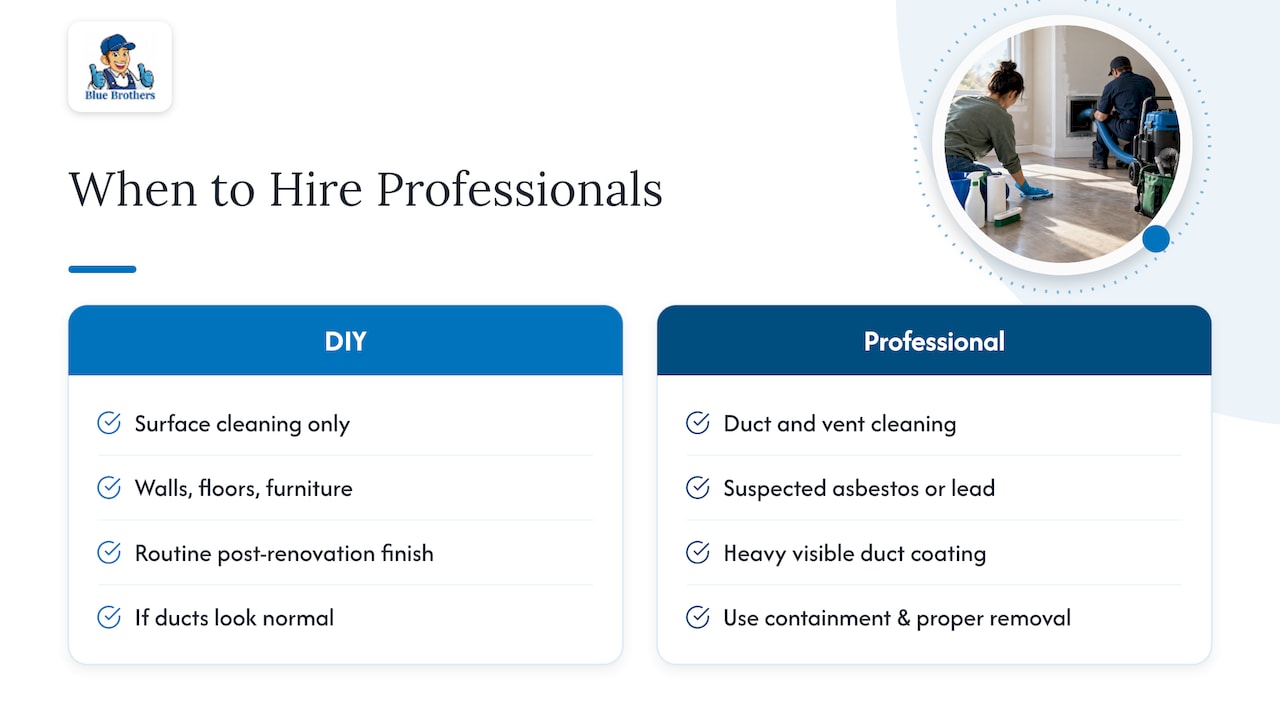
The biggest mistake we see after a renovation is stopping at the surfaces people can see. Wiped counters and vacuumed floors look finished, but dust trapped inside ducts and behind vent covers keeps circulating for weeks.
Handle wall, floor and furniture cleaning yourself. Once ducts look heavily coated or you suspect asbestos or lead, bring in a professional rather than guessing at the right technique.
— Jayce
Let us handle the air side of your renovation cleanup
Surface cleaning gets a renovated room looking finished, but the air system underneath often needs a closer look that a vacuum and a cloth cannot provide.
Heavy duct dust after a renovation calls for our air duct cleaning service, while leftover lint and debris near the laundry area raise dryer-fire risk that our dryer vent cleaning service addresses directly. Homes with heat-recovery ventilators often need a dedicated HRV cleaning pass once construction dust clogs the core, and a clogged furnace coil from the same dust load is worth a furnace cleaning check. Book a free quote and we will tell you exactly which service your renovation actually needs.
FAQ
What is the 5-5-5 rule for cleaning?
The 5-5-5 rule is a general decluttering method (five items to throw away, five to donate, five to put away) rather than a post-renovation cleaning standard. For renovation cleanup specifically, the phased sequence of debris removal, HEPA vacuuming, wet-wiping and HVAC checks is the more relevant framework.
What should I include on my post-construction cleaning list?
A solid post-construction cleaning list covers debris removal, HEPA vacuuming and wet-wiping of every surface, cleaning of newly installed cabinets and countertops, window and glass cleanup, bathroom and kitchen sanitizing, and a check of HVAC vents and filters. It should also flag older homes for possible asbestos or lead hazards before cleaning begins.
How long does it take for dust to settle after renovation?
Fine dust can stay airborne for several hours after sanding or demolition work stops, which is why ventilating the space before vacuuming matters. Running a portable HEPA air cleaner for a few hours after the main cleaning pass helps clear what remains suspended in the air.
What is the 6/10 rule for cleaning houses?
The phased, room-by-room approach covered above is the more reliable framework for post-renovation cleanup.