Contain the work zone with sealed plastic sheeting, block dust from entering your HVAC system, and finish every job with a HEPA vacuum and damp-wipe pass rather than a broom. Follow Health Canada guidance on containment and cleanup, and if you suspect lead or asbestos, stop and call a certified professional before doing anything else.
TL;DR:
- Sealing all seams, corners, and floor edges with painter’s tape is essential before work begins to prevent dust from migrating beyond containment.
- Running negative pressure with an outside-venting air scrubber is necessary for large demolition jobs to keep dust from leaking into the house and spreading.
- Protecting HVAC systems by sealing vents, using higher-efficiency filters, and shutting systems off during heavy dusting prevents duct contamination and long-term buildup.
- Waiting 30 to 60 minutes after finishing work before cleaning minimizes resuspension of settled fine dust particles in the air.
- Professional duct cleaning is recommended if signs of contamination are present or if the HVAC system was running during heavy renovation activities.
Table of Contents
- Containment: build airtight barriers, single entry and when to use negative pressure
- Protecting HVAC, vents and ducts so dust doesn’t become a permanent problem
- Post-renovation cleaning: follow the two-pass HEPA vacuum and damp-wipe protocol
- Hazardous-materials checklist: spotting lead or asbestos and where to get help
- Tools and supplies checklist: what to rent or buy
- Timing and checklist: before, during and after
- Practitioner perspective: why a professional duct or vent cleaning matters
- What this guide gets right that most advice skips
- Professional cleanup after your renovation is done
- FAQ
- Sources
Containment: build airtight barriers, single entry and when to use negative pressure
A renovation zone needs a real barrier, not a loose sheet taped over a doorway. Start by sealing floor-to-ceiling plastic sheeting over doorways, vents, and openings, then tape every seam and run a strip along the floor perimeter so dust cannot migrate under the barrier. A zipper-door kit gives you a single entry point instead of a flapping sheet that pumps dust out every time someone walks through.
- Seal all seams, corners and floor edges with painter’s tape before work begins.
- Use one zipper-door entry point and post a sign reminding workers to close it fully.
- Stage a small decontamination spot just inside the entry where workers can brush off debris before leaving.
- Test the barrier with a smoke pencil or a piece of tissue held near the seams: movement means air is leaking through.
For bigger jobs such as full demolition, drywall sanding or masonry cutting, passive sheeting is not enough. Occupational hygiene practice calls for negative pressure: an air scrubber vented outside pulls air out of the containment zone faster than it can leak in, so dust is drawn inward rather than pushed out into your living space. CCOHS abatement guidance lists negative-air enclosures and HEPA-filtered exhaust as standard controls for exactly this reason.
Pro Tip: Run your smoke test with the exhaust fan or air scrubber already operating. A containment that holds under static conditions can still leak once air is moving through it.
Protecting HVAC, vents and ducts so dust doesn’t become a permanent problem
Your furnace fan is the fastest way dust spreads to every room in the house. A central return pulls in fine particles the moment it switches on, and from there your ductwork distributes them throughout the whole system, not just the renovation zone.
- Cover supply and return registers in the work area with plastic sheeting and tape before starting.
- Swap your furnace filter for a higher-efficiency filter during the project to catch more of what does get pulled in.
- Run a portable HEPA air cleaner inside the containment zone rather than relying on the furnace fan alone.
- Shut the HVAC system off completely during heavy sanding or demolition, then switch to filtered operation for lighter tasks.
Guidance for indoor air quality professionals recommends checking or replacing HVAC filters after any dusty renovation. If you skipped sealing registers, ran the fan through demolition, or notice dust streaking near vent covers once the job is done, your ducts likely received a dose of fine debris and are worth having professionally cleaned.
Post-renovation cleaning: follow the two-pass HEPA vacuum and damp-wipe protocol
Cleaning too soon is a common mistake. Fine dust takes time to settle, so wait 30 to 60 minutes after the last tool shuts off before you touch anything, a detail Health Canada’s guidance specifically calls out because disturbing airborne particles too early just resuspends them.
- Wait for a suitable amount of time for dust to settle before starting.
- Run a HEPA-filter vacuum over ceilings, walls, ledges, floors, and soft surfaces first.
- Damp-wipe or damp-mop every hard surface in a second pass, working from the top of the room down.
- Have upholstery, curtains and rugs professionally cleaned if they were exposed, since wiping won’t remove embedded dust.
- Replace filters in your HVAC system and any portable air cleaner once cleaning is finished.
A two-pass routine, HEPA vacuum followed by damp-wipe, is the recommended cleanup method because ordinary vacuums and dry sweeping redistribute the fine, respirable particles a renovation generates instead of removing them.
Skip the push broom and the shop-vac without a HEPA filter. Compressed air is worse: it blasts fine particles straight back into the air you breathe.

Hazardous-materials checklist: spotting lead or asbestos and where to get help
Homes built before 1990 are the ones to watch closely, since older paint, plaster, vinyl floor tiles and pipe insulation can contain lead or asbestos. CCOHS warns that disturbing these materials, through sanding, scraping, drilling or demolition, releases fibres and dust that pose a lasting health risk.
- Stop work immediately if you suspect lead paint or asbestos-containing material.
- Never sand, scrape, drill or burn a suspect material; Health Canada is explicit that this releases hazardous dust.
- Get the material tested by a certified lab before deciding how to proceed.
- Call a qualified abatement specialist for removal rather than attempting it yourself.
- For everyday dusty tasks that aren’t hazardous-material related, a properly fitted N95 or P100 respirator and safety glasses are reasonable minimum protection.
Tools and supplies checklist: what to rent or buy
A few specific items make the difference between real containment and a false sense of security.
- A vacuum carrying an actual HEPA certification label, not just a marketing claim of “HEPA-style.”
- Polyethylene sheeting (minimum 6 mil), a zipper-door kit, painter’s tape and disposable drop cloths.
- A portable HEPA air cleaner sized to your room’s square footage, run continuously during work.
- A MERV-13 furnace filter as a cheaper supplement, understanding it filters less efficiently than true HEPA.
- For larger jobs, renting an air scrubber or negative-air machine sized to your containment zone’s volume rather than the whole house.
Daily HEPA vacuum rental or small air scrubber rental is usually more cost-effective than buying for a one-off project, while a HEPA vacuum is worth owning if you renovate often.
Timing and checklist: before, during and after
A simple sequence keeps you from missing a step partway through a messy job.
- Before: remove valuables and soft furnishings, seal registers and doorways, set up negative pressure if needed, and agree on PPE rules with anyone working.
- During: use the single entry point every time, keep air cleaners running, wipe up debris as it accumulates instead of letting it build up, and bag waste before it leaves the containment zone.
- After: run the two-pass HEPA and damp-wipe cleaning, replace HVAC and portable filters, and inspect registers for dust buildup.
- If ducts show signs of contamination, book a professional duct cleaning rather than assuming a filter change solved it.
For step-by-step prep specific to drywall and painting work, this contractor guide covers room-by-room staging in more detail.
Practitioner perspective: why a professional duct or vent cleaning matters
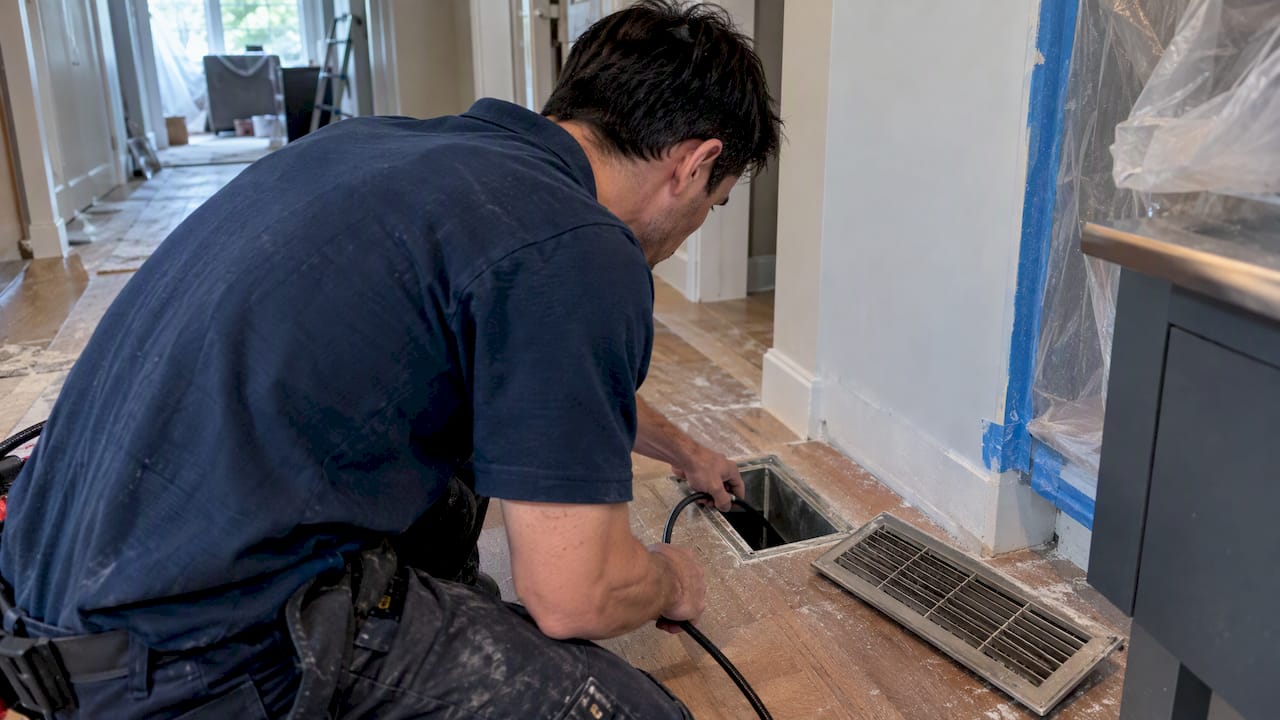
We get called in most often after sanding, demolition or a kitchen remodel that pushed dust past the containment and into the ductwork, and the signs are usually a musty smell from the vents or visible buildup around registers. A proper inspection checks every run with a camera, not just the accessible sections, and uses HEPA-filtered equipment so the dust leaves the house instead of getting stirred up again. Before booking anyone, ask about certification, what equipment they use, and whether they can show you before-and-after photos of the work. For kitchen exhaust systems specifically, confirm the technician follows NFPA 96 standards, since grease buildup in hood systems is a fire risk that general duct cleaning doesn’t address.
What this guide gets right that most advice skips
Most renovation articles treat dust as a cleanup inconvenience. The research tells a different story: fine respirable particles from renovation work are a genuine health concern on their own, and containment, source control and HEPA filtration are the actual levers that lower exposure, not a tidy-looking job site.
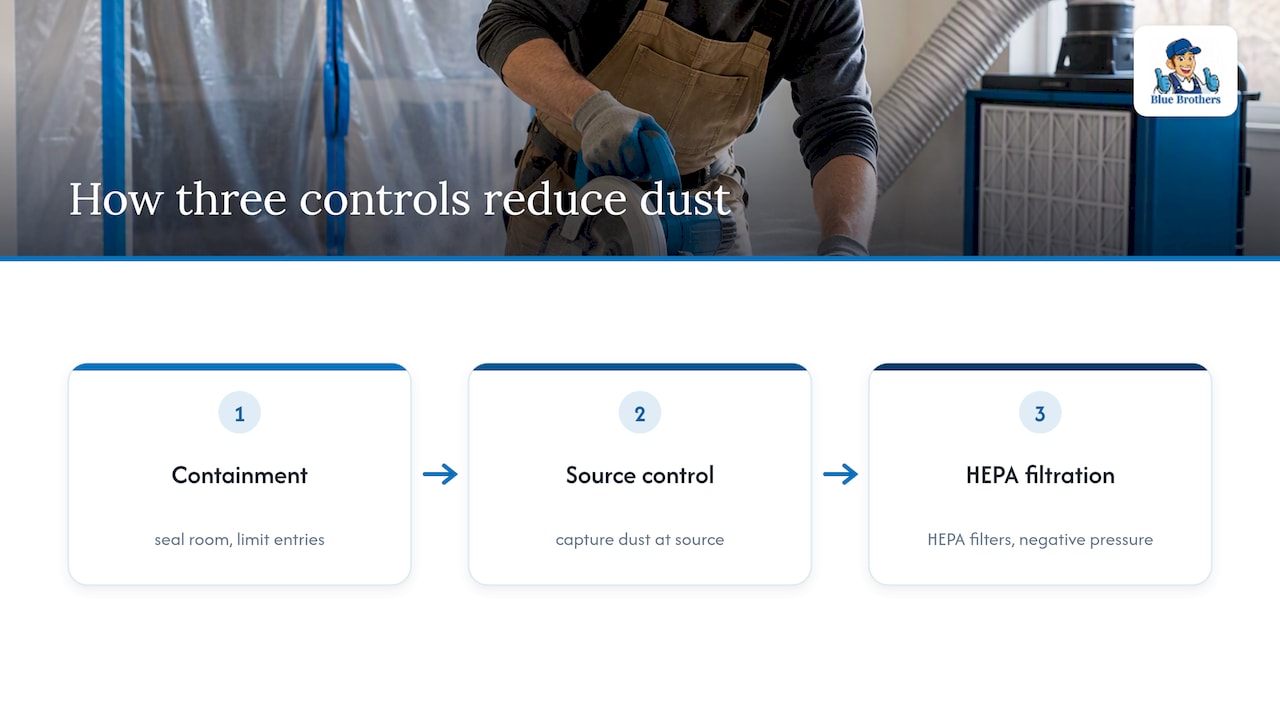
The conventional advice oversells plastic sheeting as sufficient on its own. A sheet over a doorway slows dust, but without sealed seams, a single entry point and, for bigger jobs, negative pressure, it is mostly theatre. The detail homeowners skip most often is the HVAC system: people tape off a doorway carefully and then let the furnace fan run all day, which turns a contained mess into a house-wide one.
If you do only one thing differently after reading this, protect your HVAC system before the first cut is made. Containment failures stay in one room. HVAC failures end up in every room your ducts reach, and they’re far more expensive to fix after the fact.
— Jayce
Professional cleanup after your renovation is done
Once the drywall dust settles, literally, a lot of homeowners find their ducts, dryer vent or HRV system picked up more debris than the filters caught. We handle air duct cleaning, dryer vent cleaning, HRV cleaning, and grease exhaust and hood cleaning for homes and businesses across British Columbia, Alberta and Saskatchewan.
- Choose a professional cleaning if registers show buildup, you ran the HVAC during heavy sanding, or you’re finishing a kitchen remodel near a hood system.
- DIY filter changes and vacuum passes are fine for light dust that never reached the ductwork.
- Various booking options are available, with pricing information provided through official channels.
Request a quote for duct cleaning and we’ll walk you through what your system needs before any work starts.
FAQ
How do you control dust at a construction site?
Seal the work area with plastic sheeting and a single entry point, run negative pressure or a HEPA air cleaner for larger jobs, and clean up with wet methods instead of dry sweeping. CCOHS guidance lists containment and HEPA-filtered ventilation as the standard controls for construction dust.
How do you stop dust from settling throughout a house?
Seal doorways and HVAC registers before work starts so dust never leaves the renovation zone, and run a portable HEPA air cleaner inside the containment area. Once work is done, a HEPA vacuum and damp-wipe pass removes what did escape rather than letting it resettle.
What is a simple trick for reducing household dust?
A damp microfibre cloth picks up far more dust than a dry one because moisture traps particles instead of scattering them into the air. This is the same principle behind the damp-wipe step in post-renovation cleaning, just applied to everyday dusting.
Where does dust collect the most after a renovation?
Dust settles heaviest on horizontal surfaces close to the work area first, including ledges, shelves and floors, but ducts and HVAC registers quietly collect it too if the system ran during the job. Soft furnishings like curtains and upholstery also trap fine particles that a quick wipe won’t remove.
Should I call a professional for renovation dust, or handle it myself?
Handle light dust yourself with sealed containment, HEPA vacuuming and damp-wiping. Call a certified professional immediately if you suspect lead paint or asbestos, or if your ducts show signs of heavy contamination after the work is finished, since CCOHS recommends stopping work entirely in those cases.